Figure 1. Add Data Source
Figure 1. Add Data Source
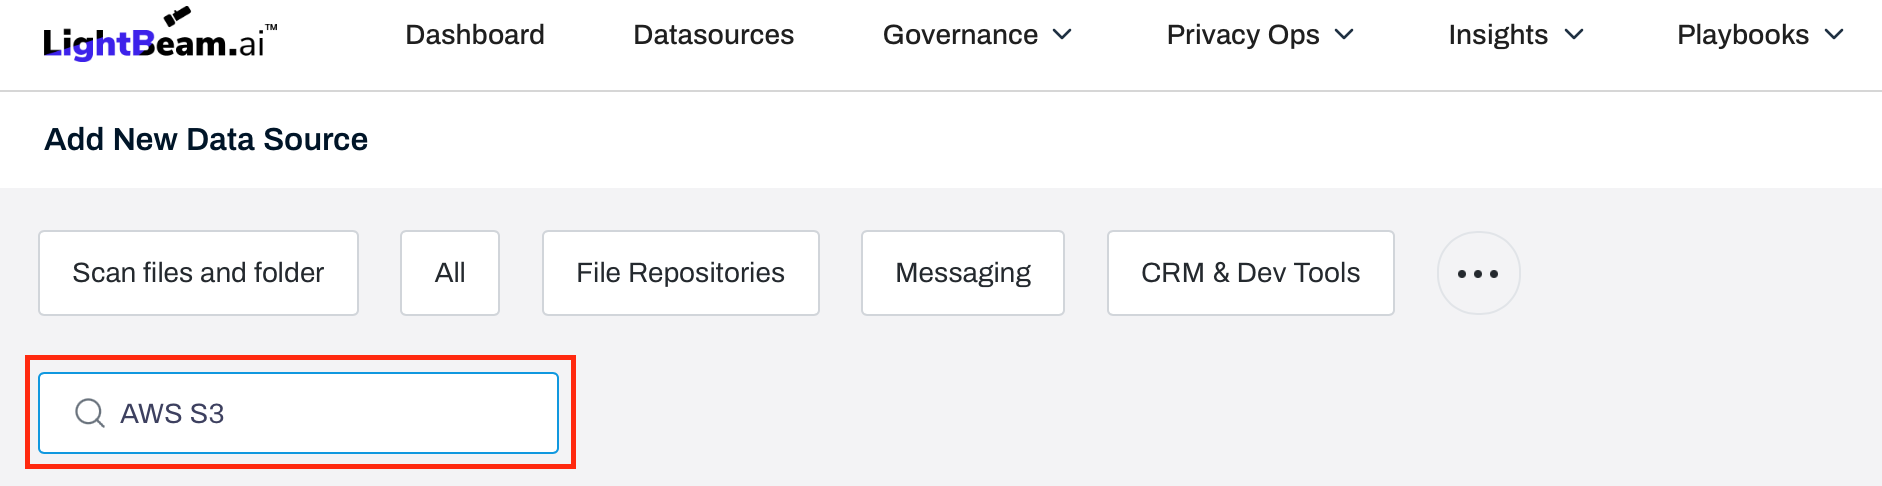
Figure 2. Search AWS S3
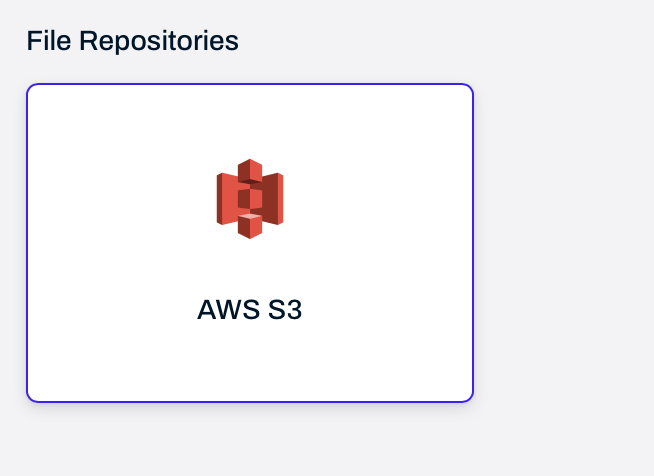
Figure 2.1 AWS S3
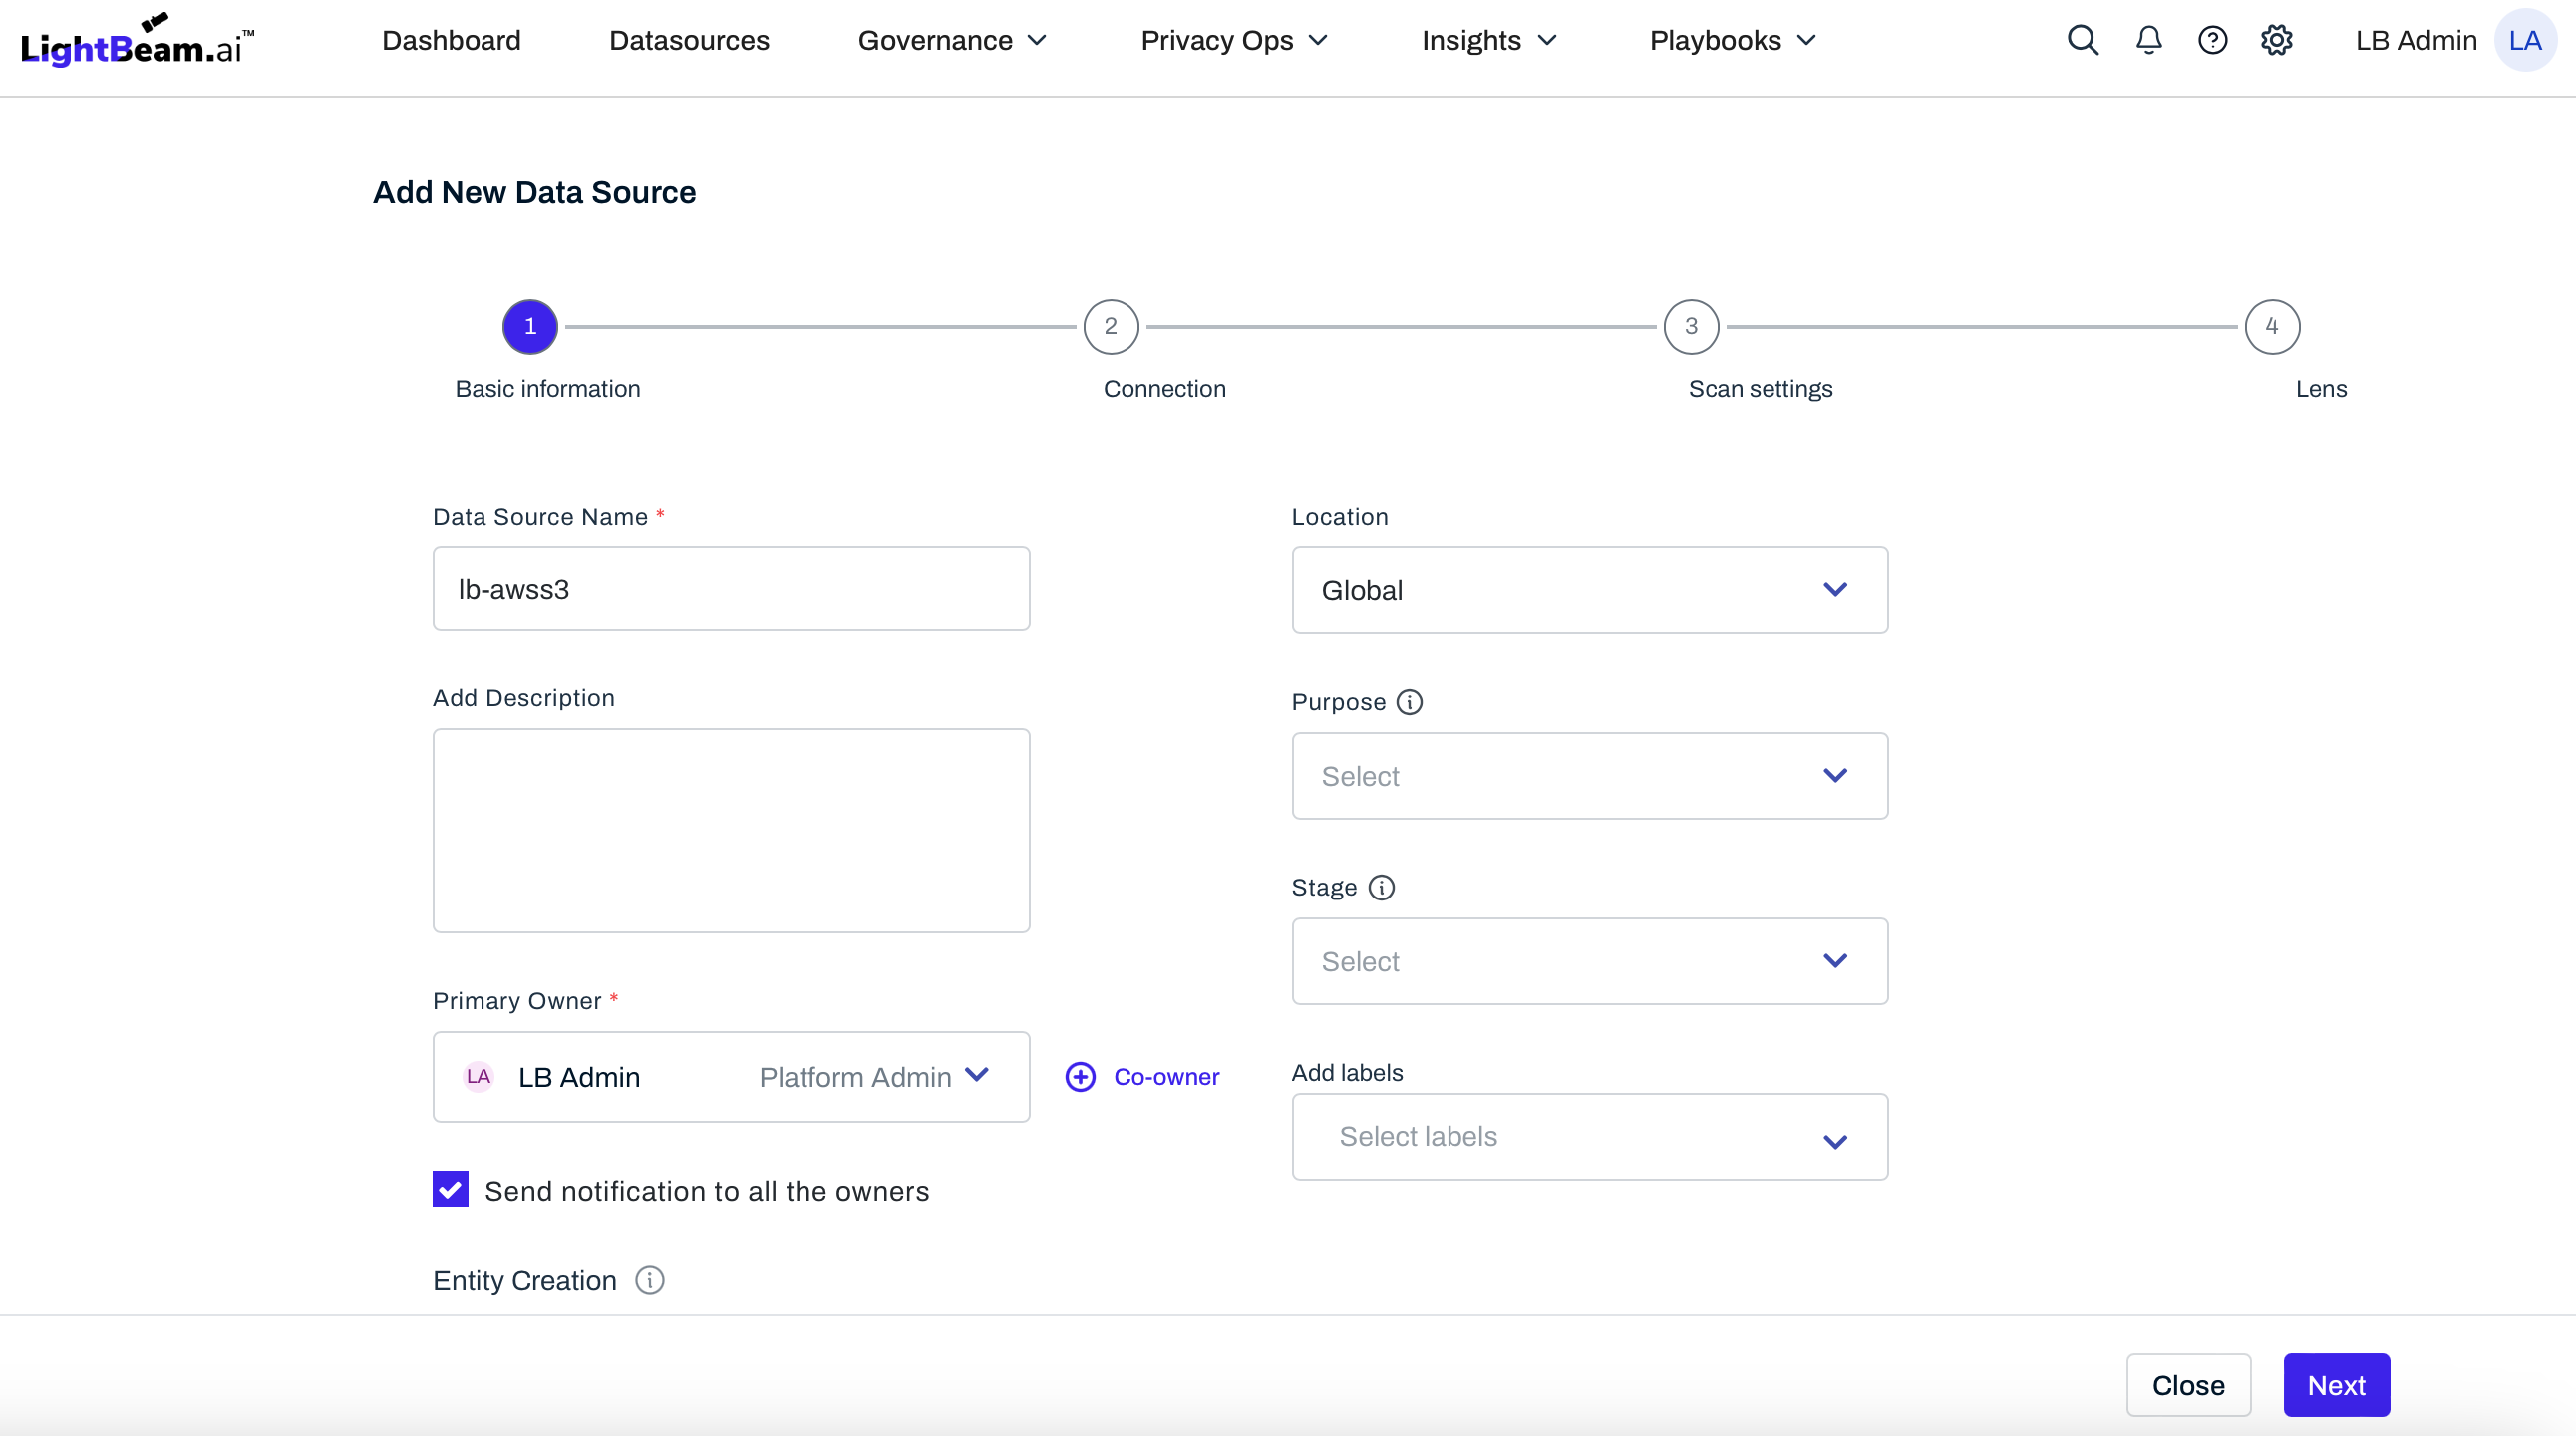
Figure 3. LightBeam AWS S3 - Basic Information
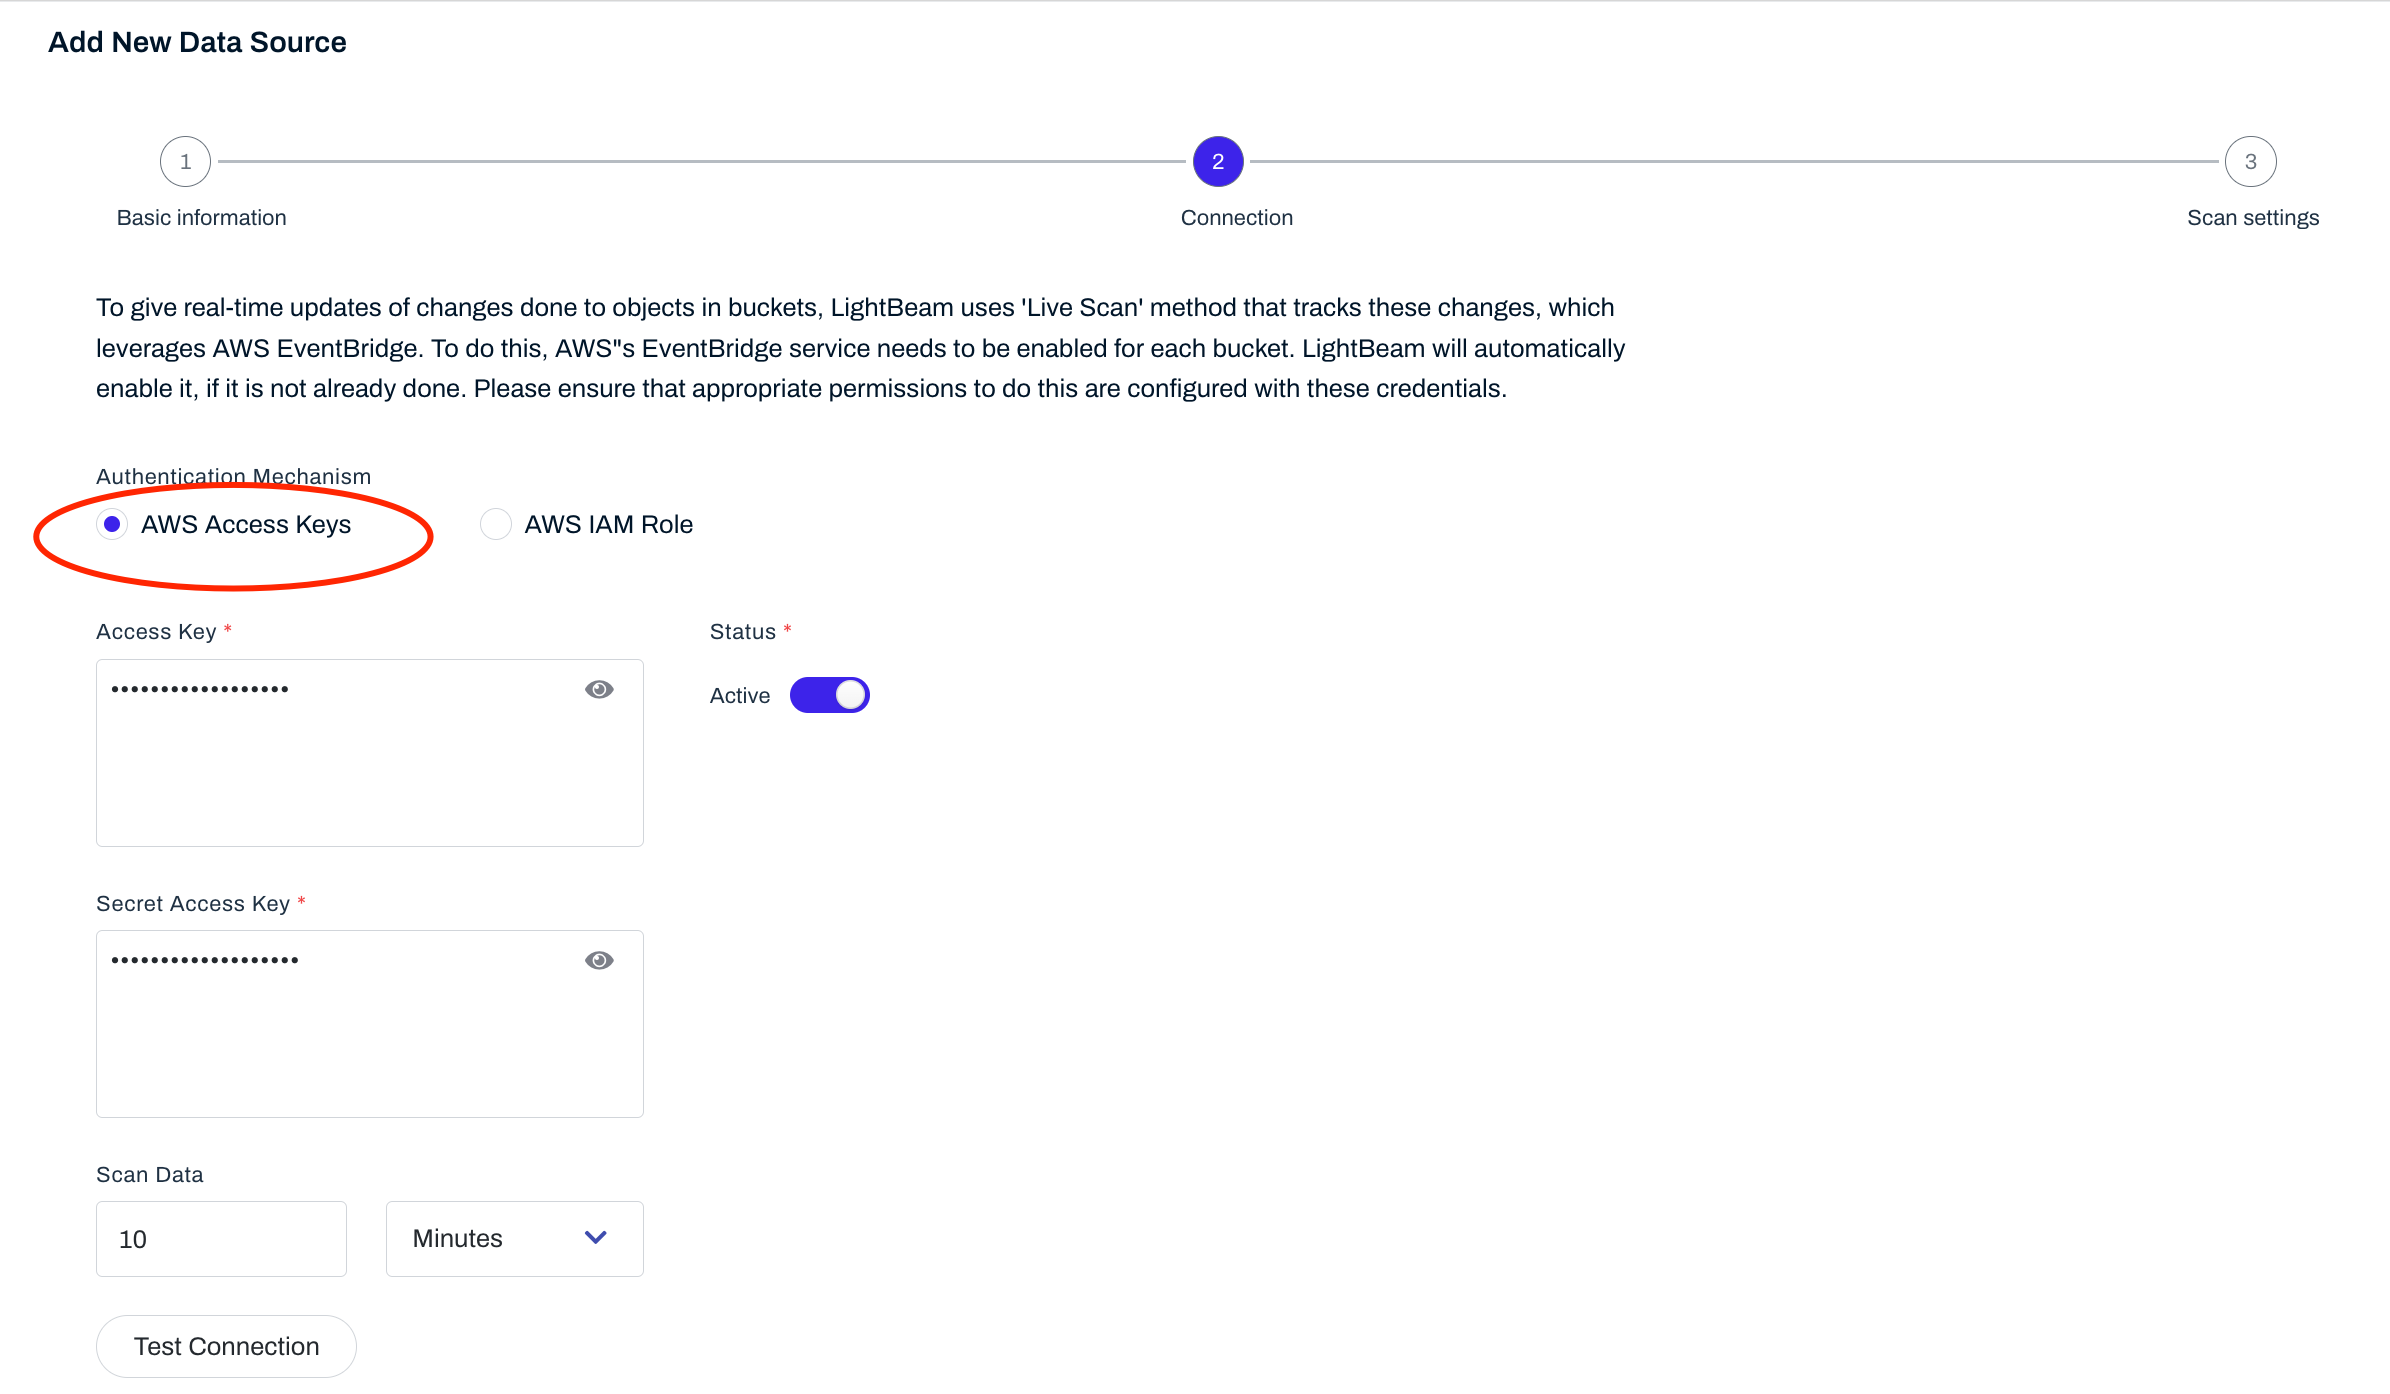
Figure 4. LightBeam AWS S3 - Configuration
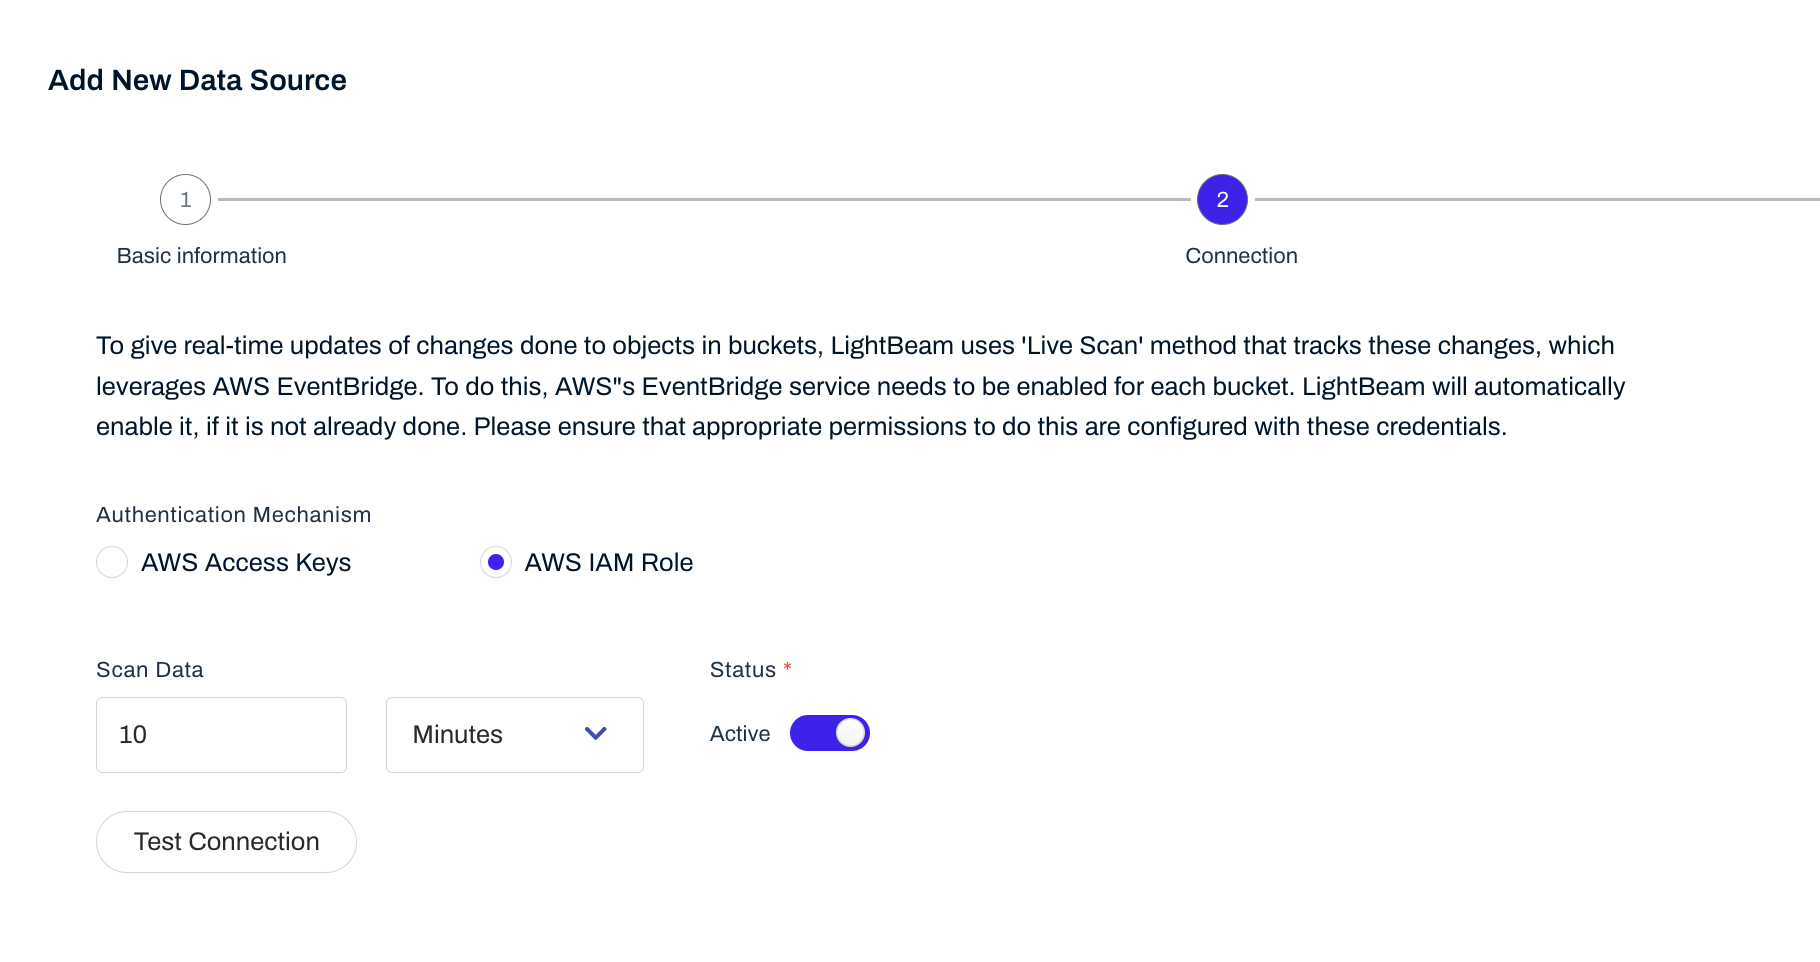
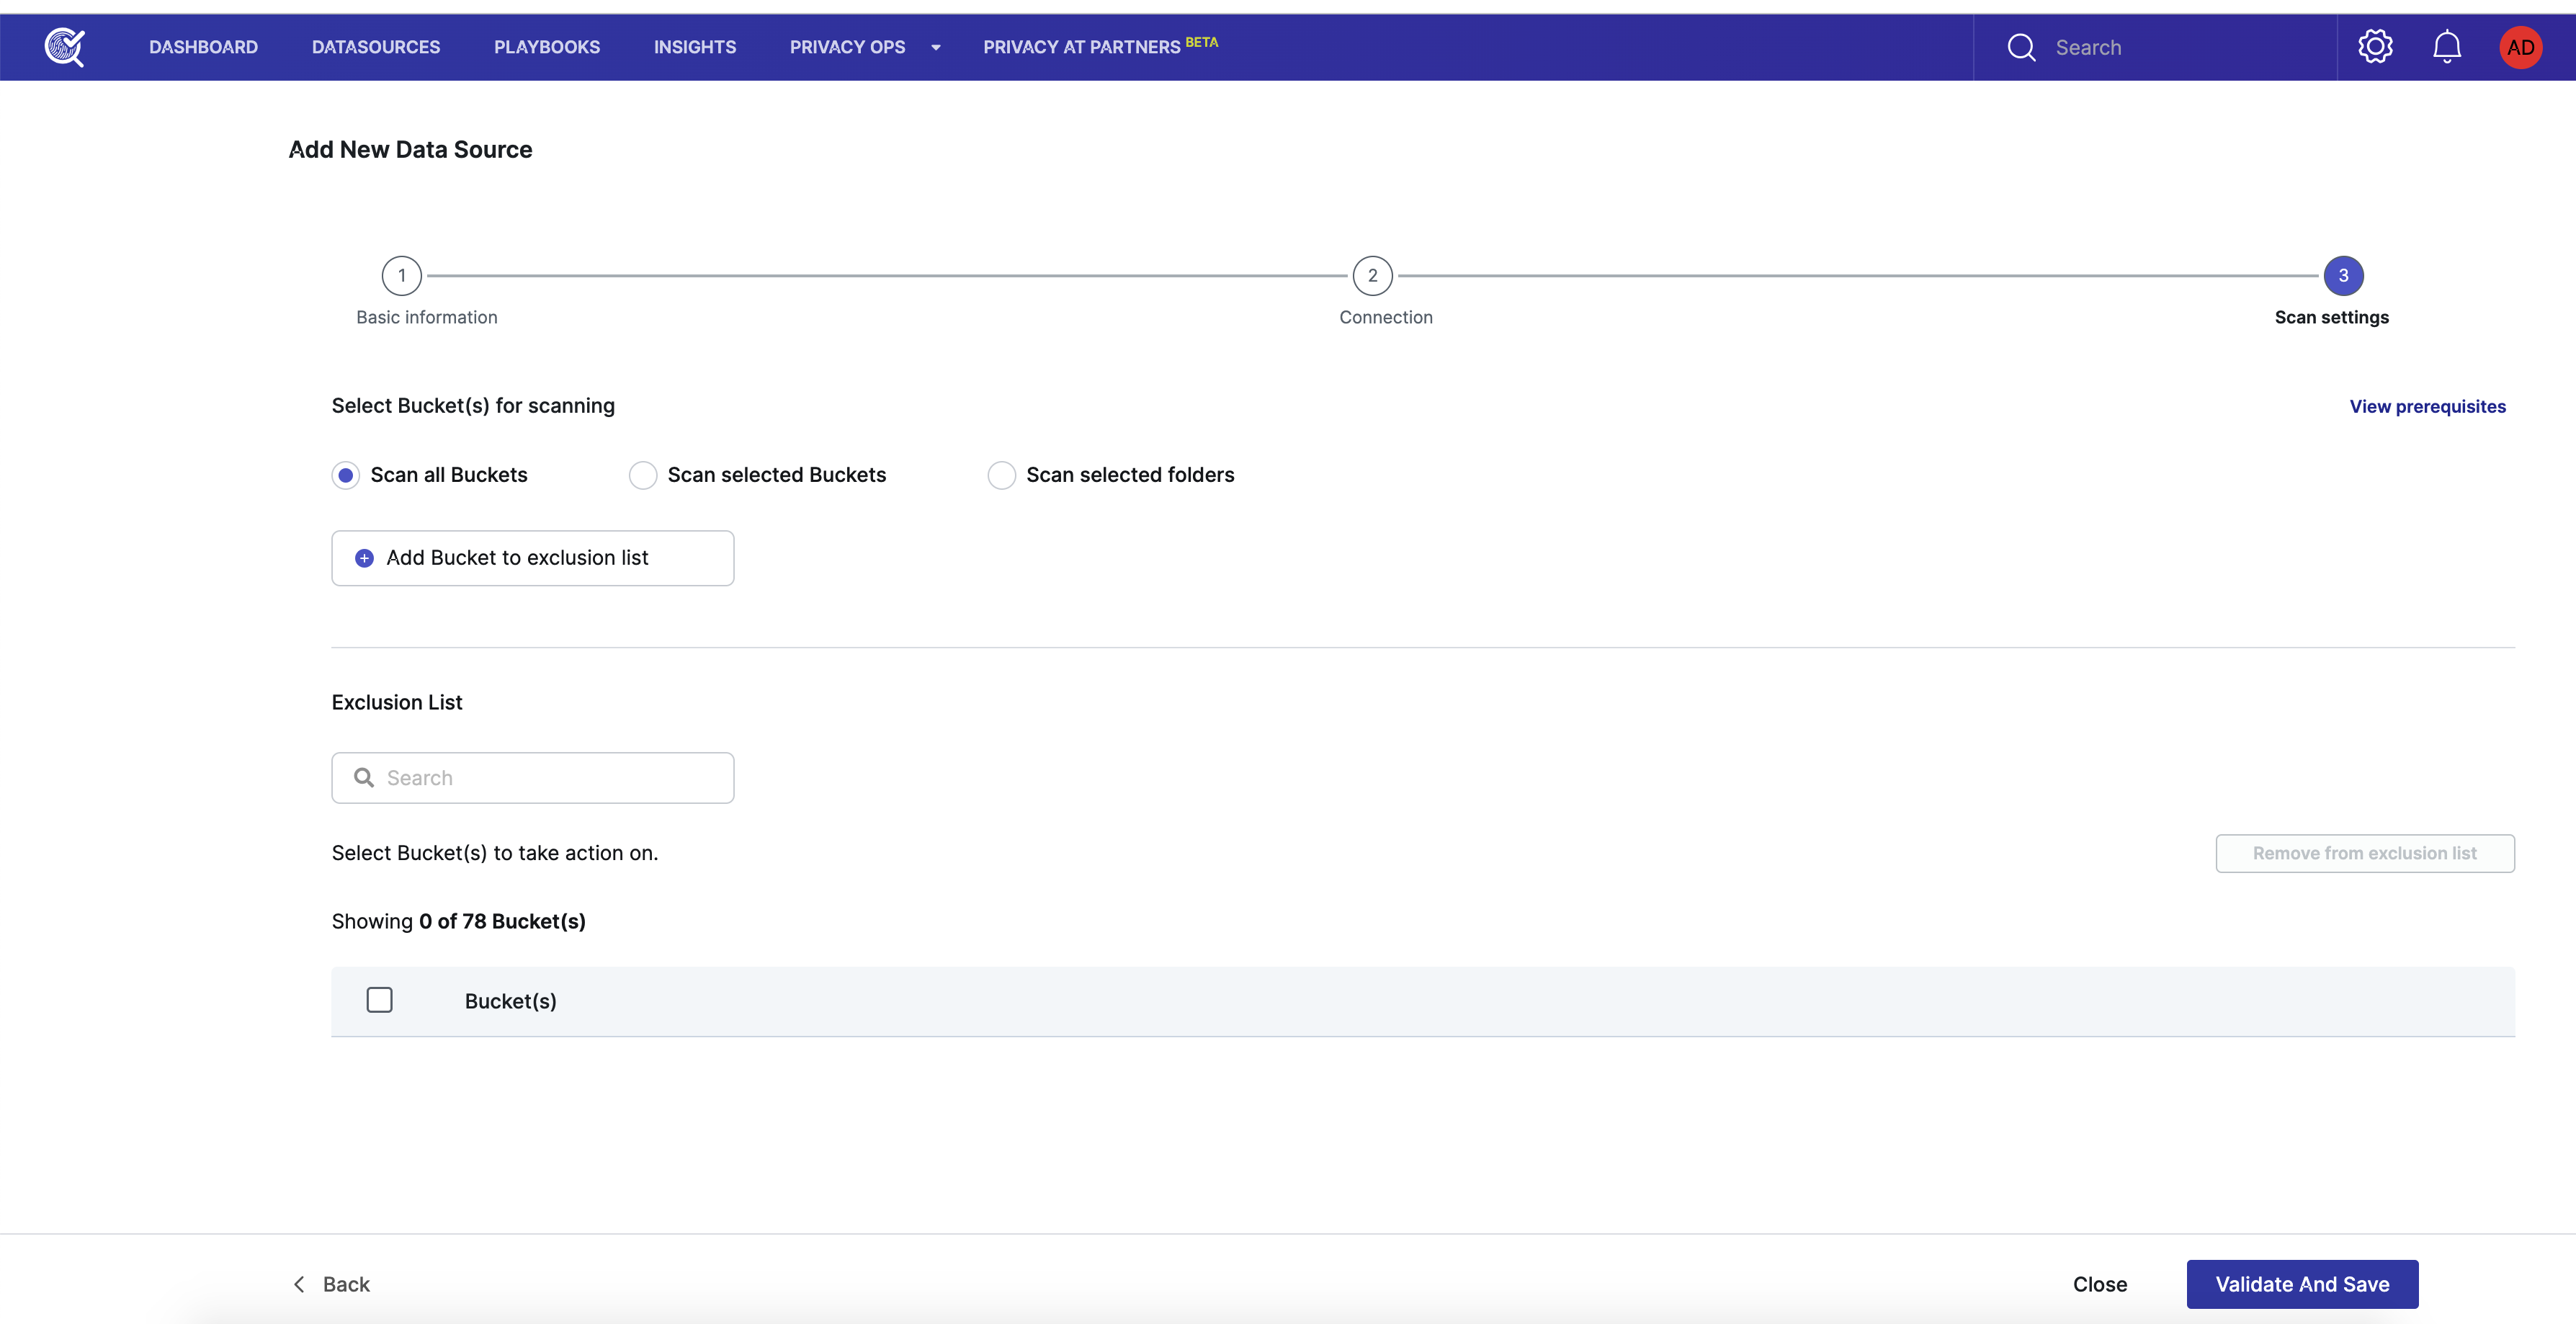
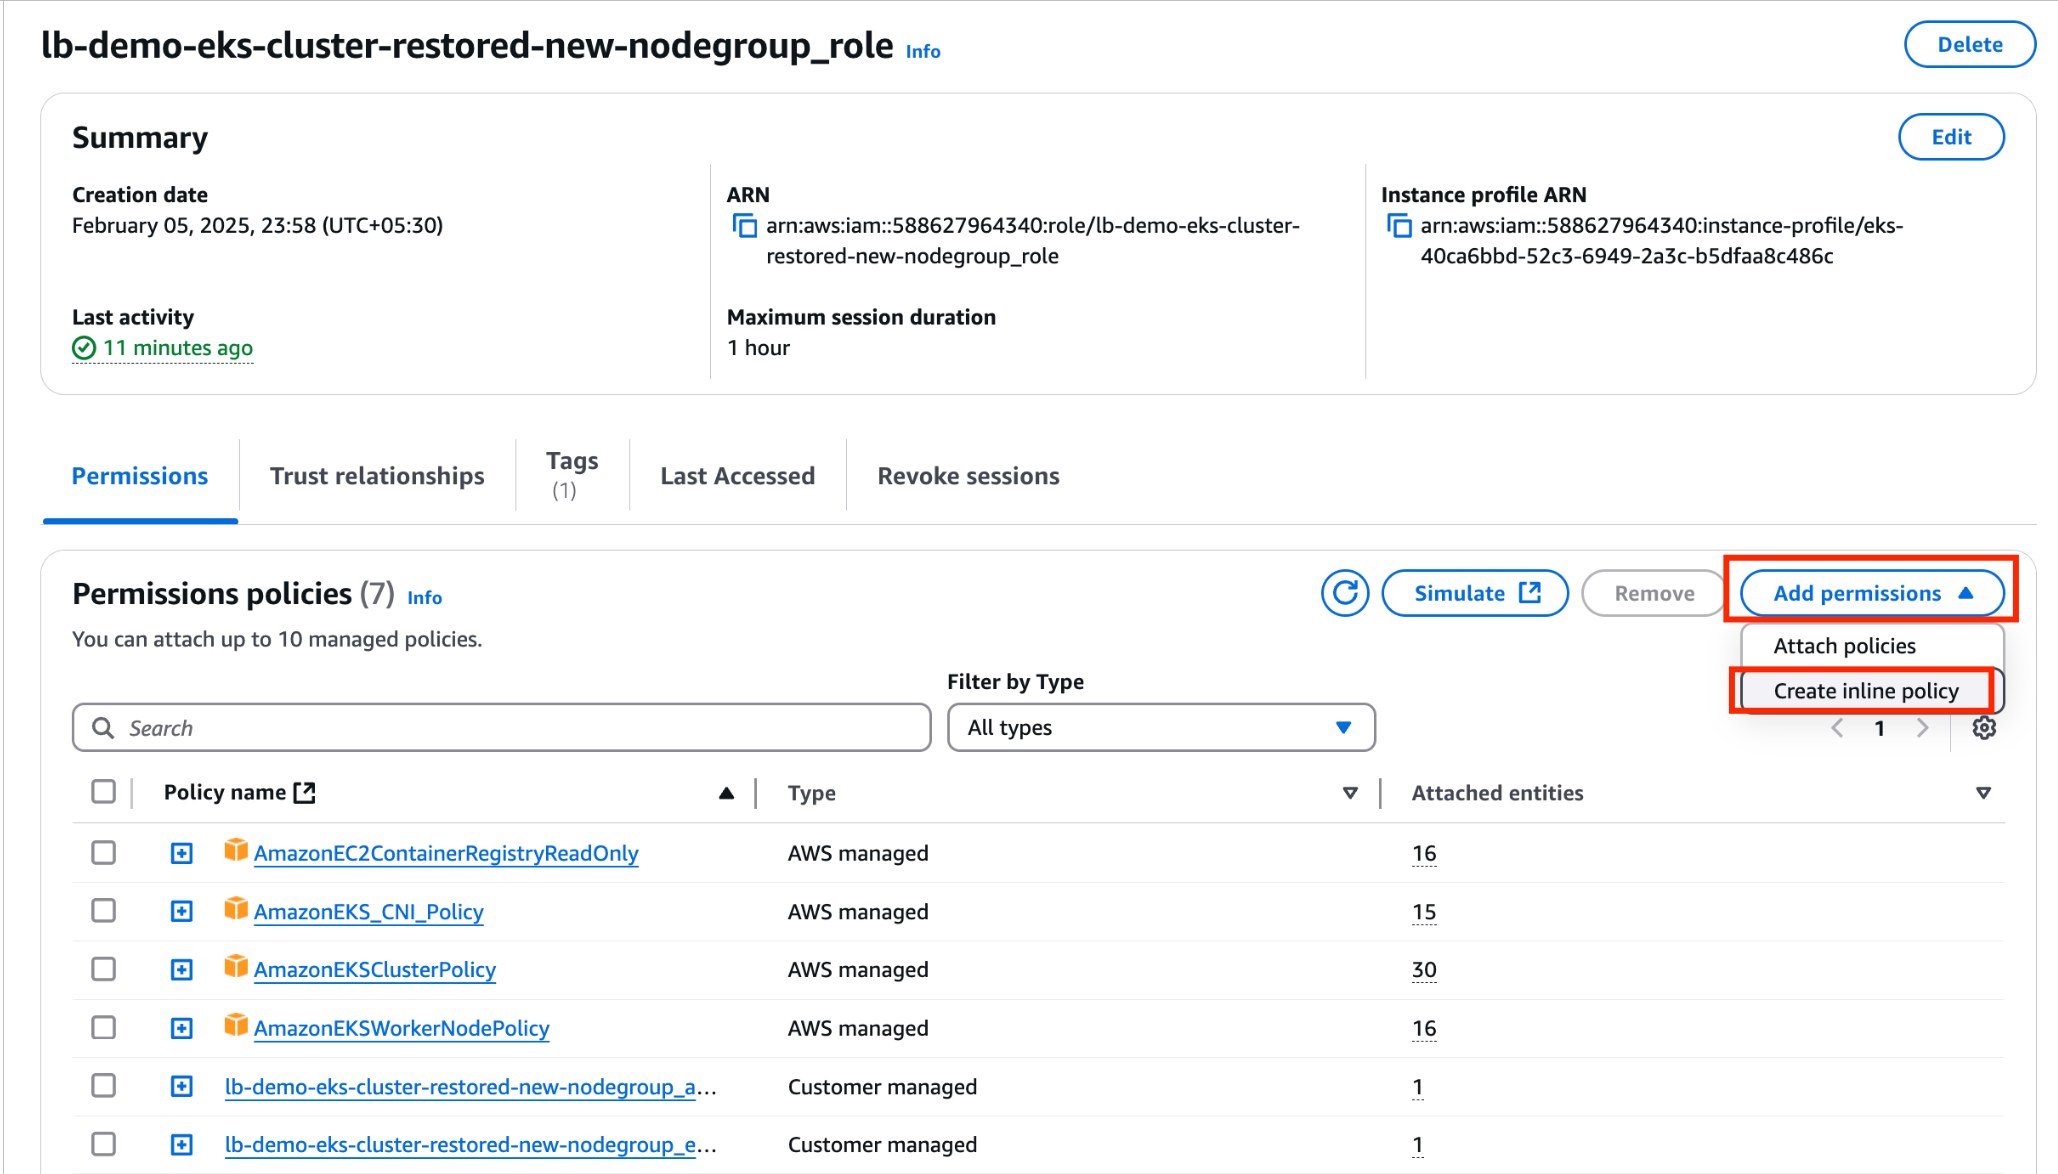
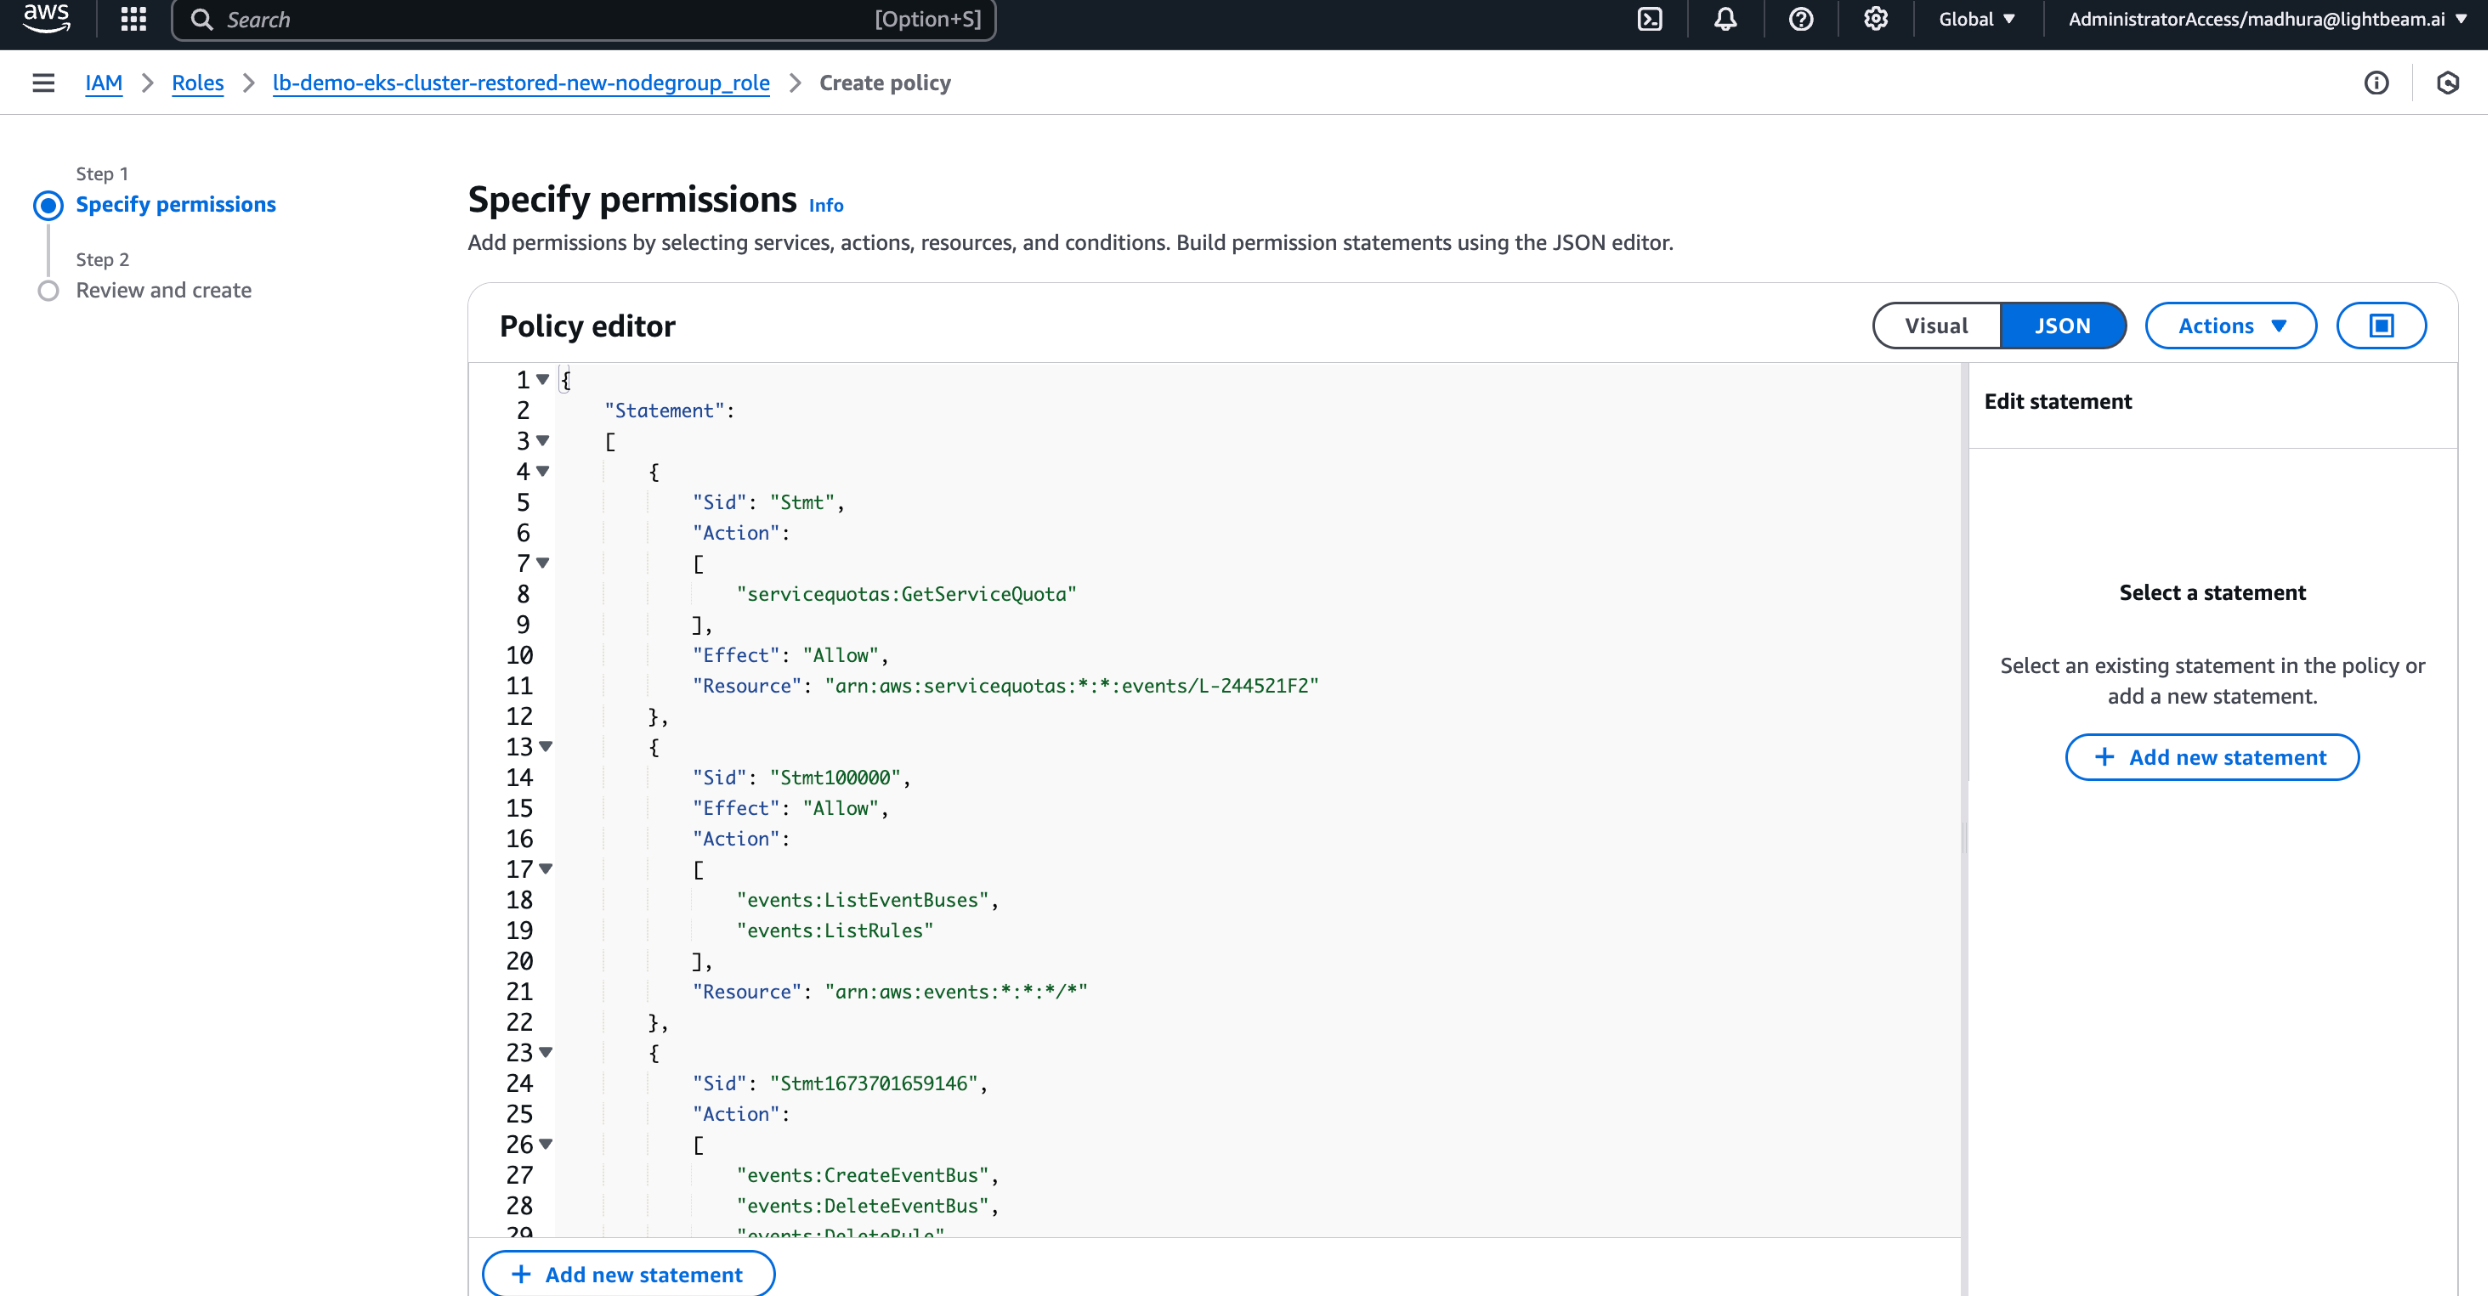
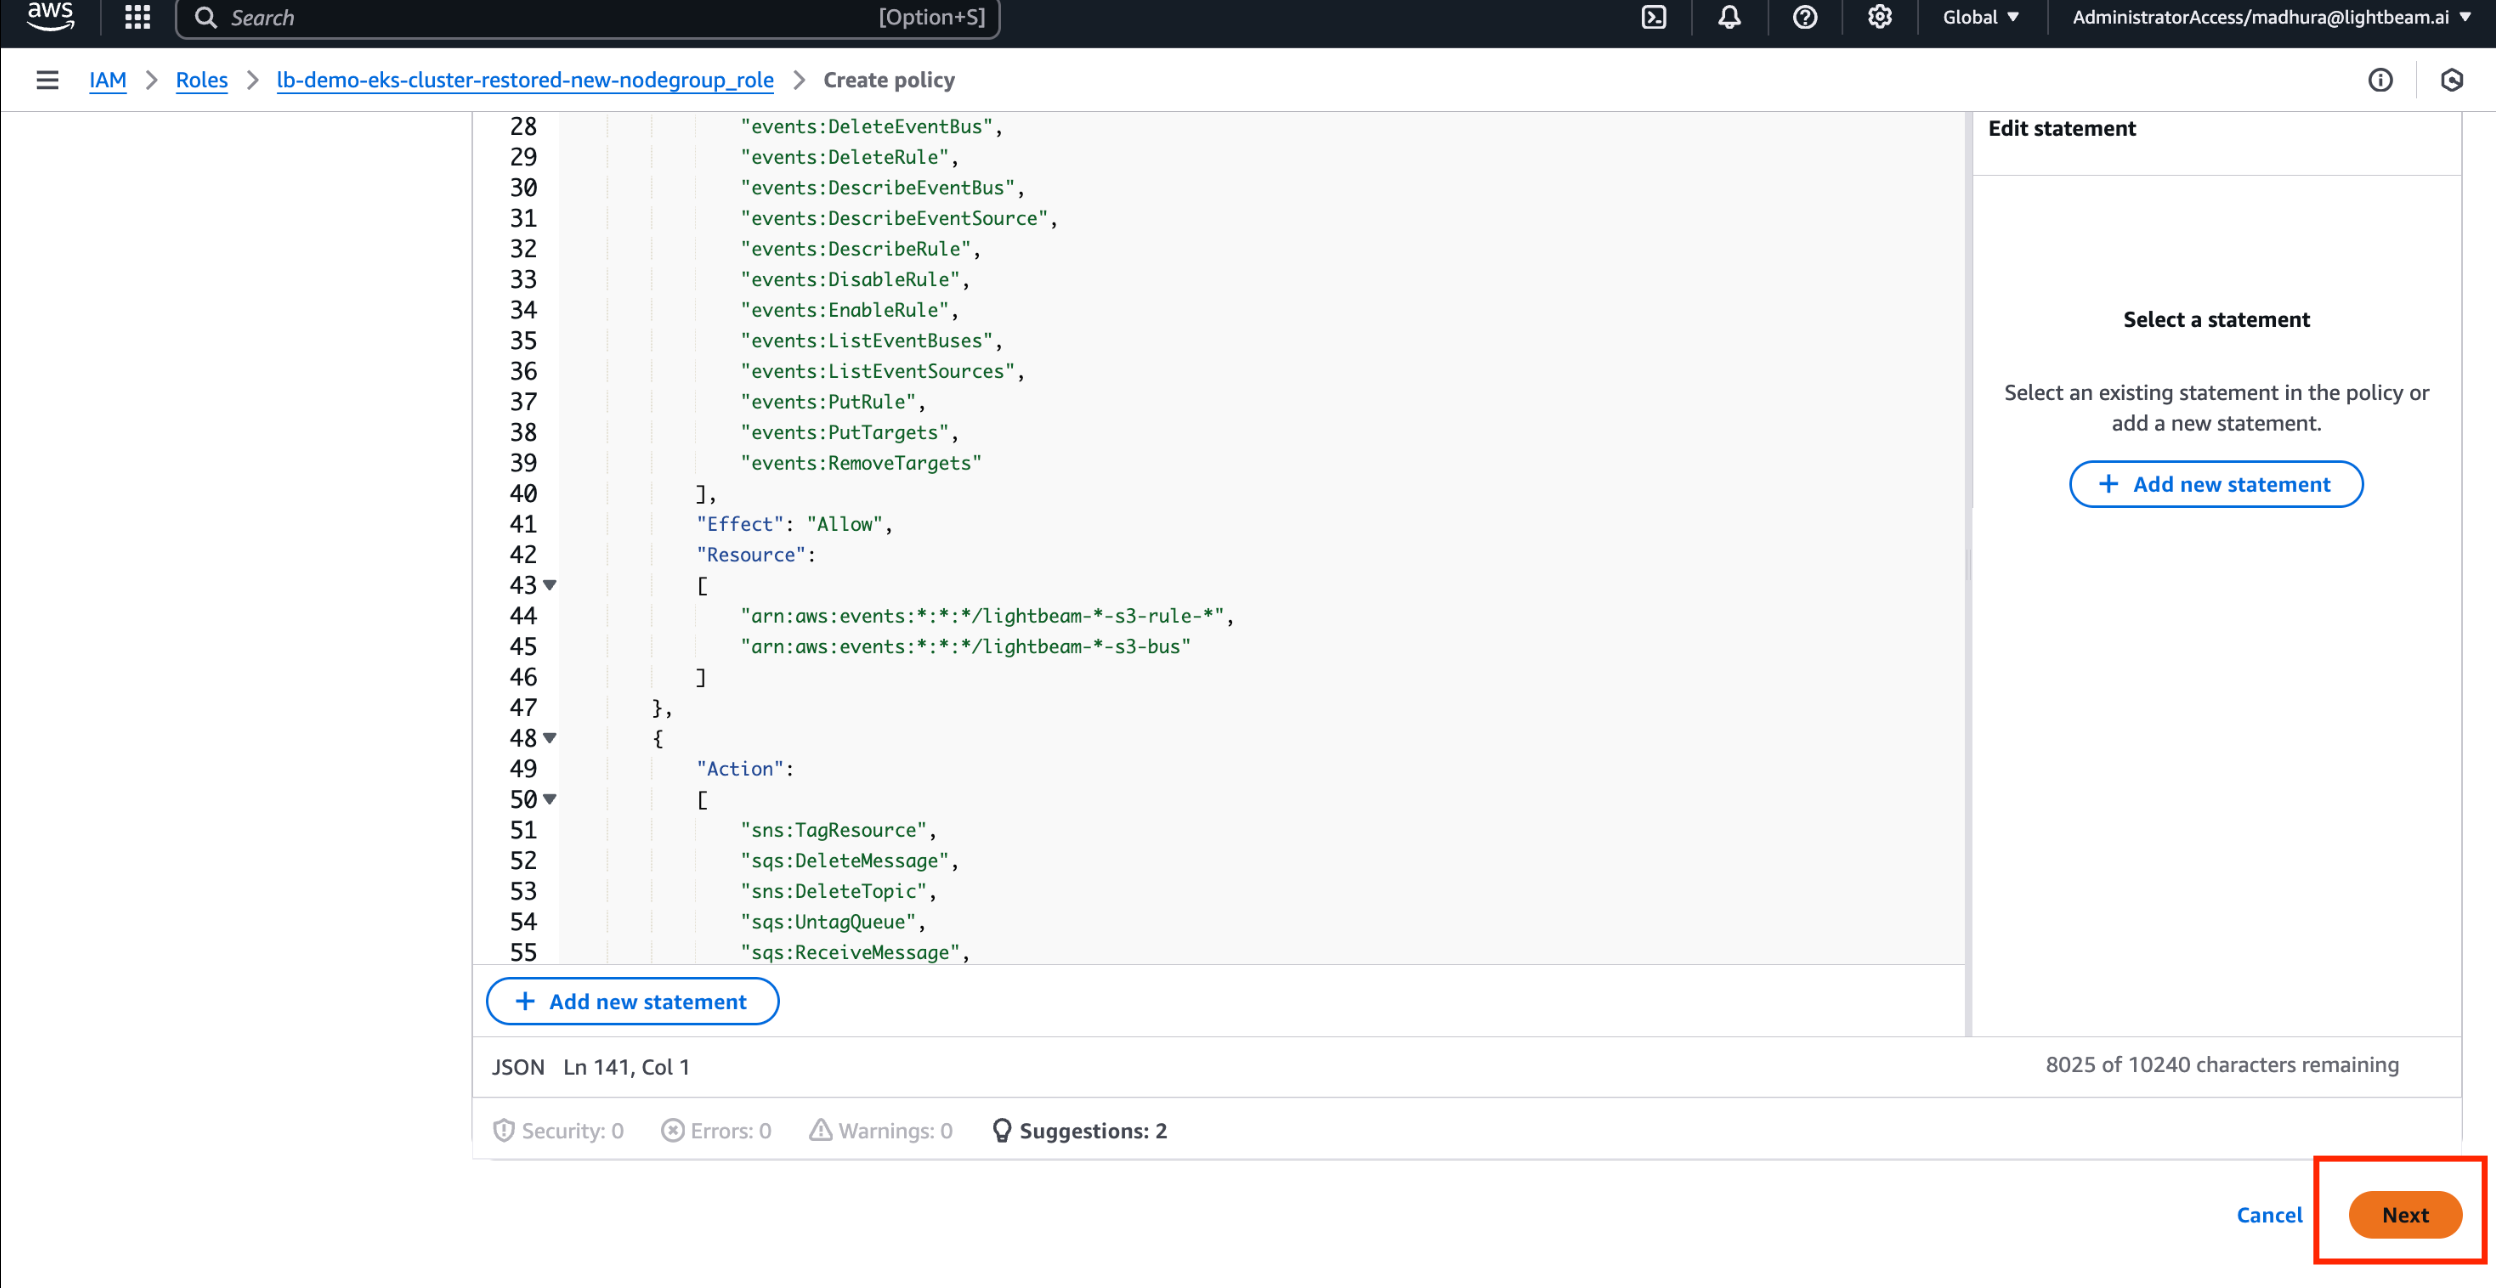
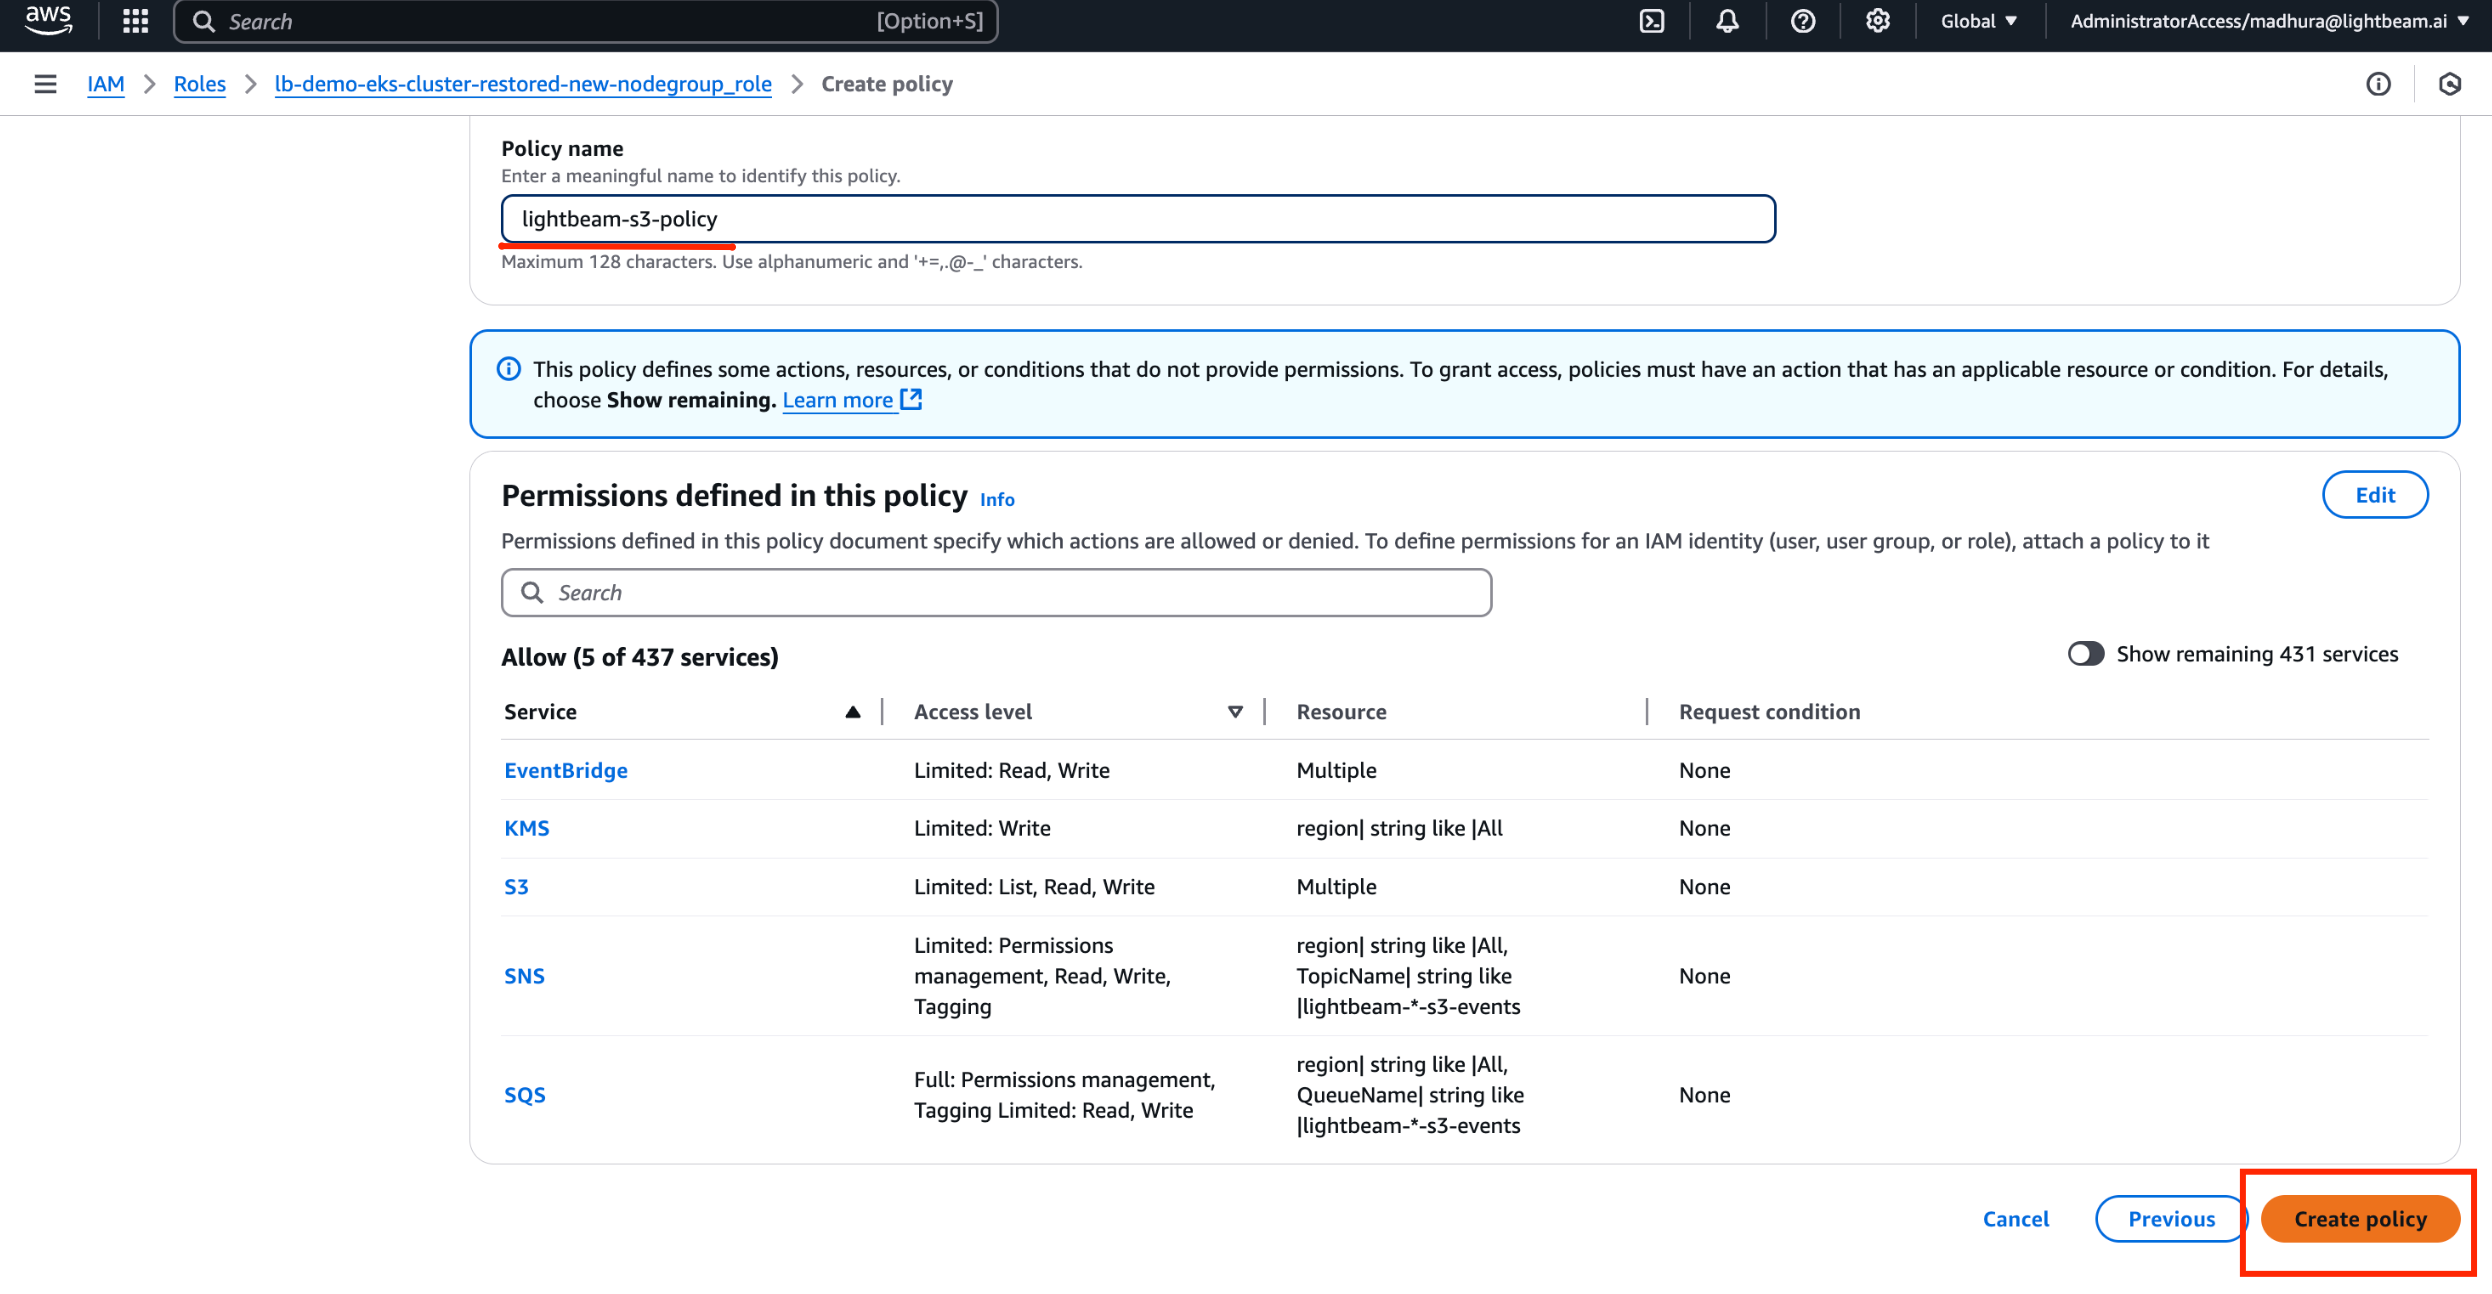
Figure 5.1(a) Scan all buckets - Registration of S3 Buckets
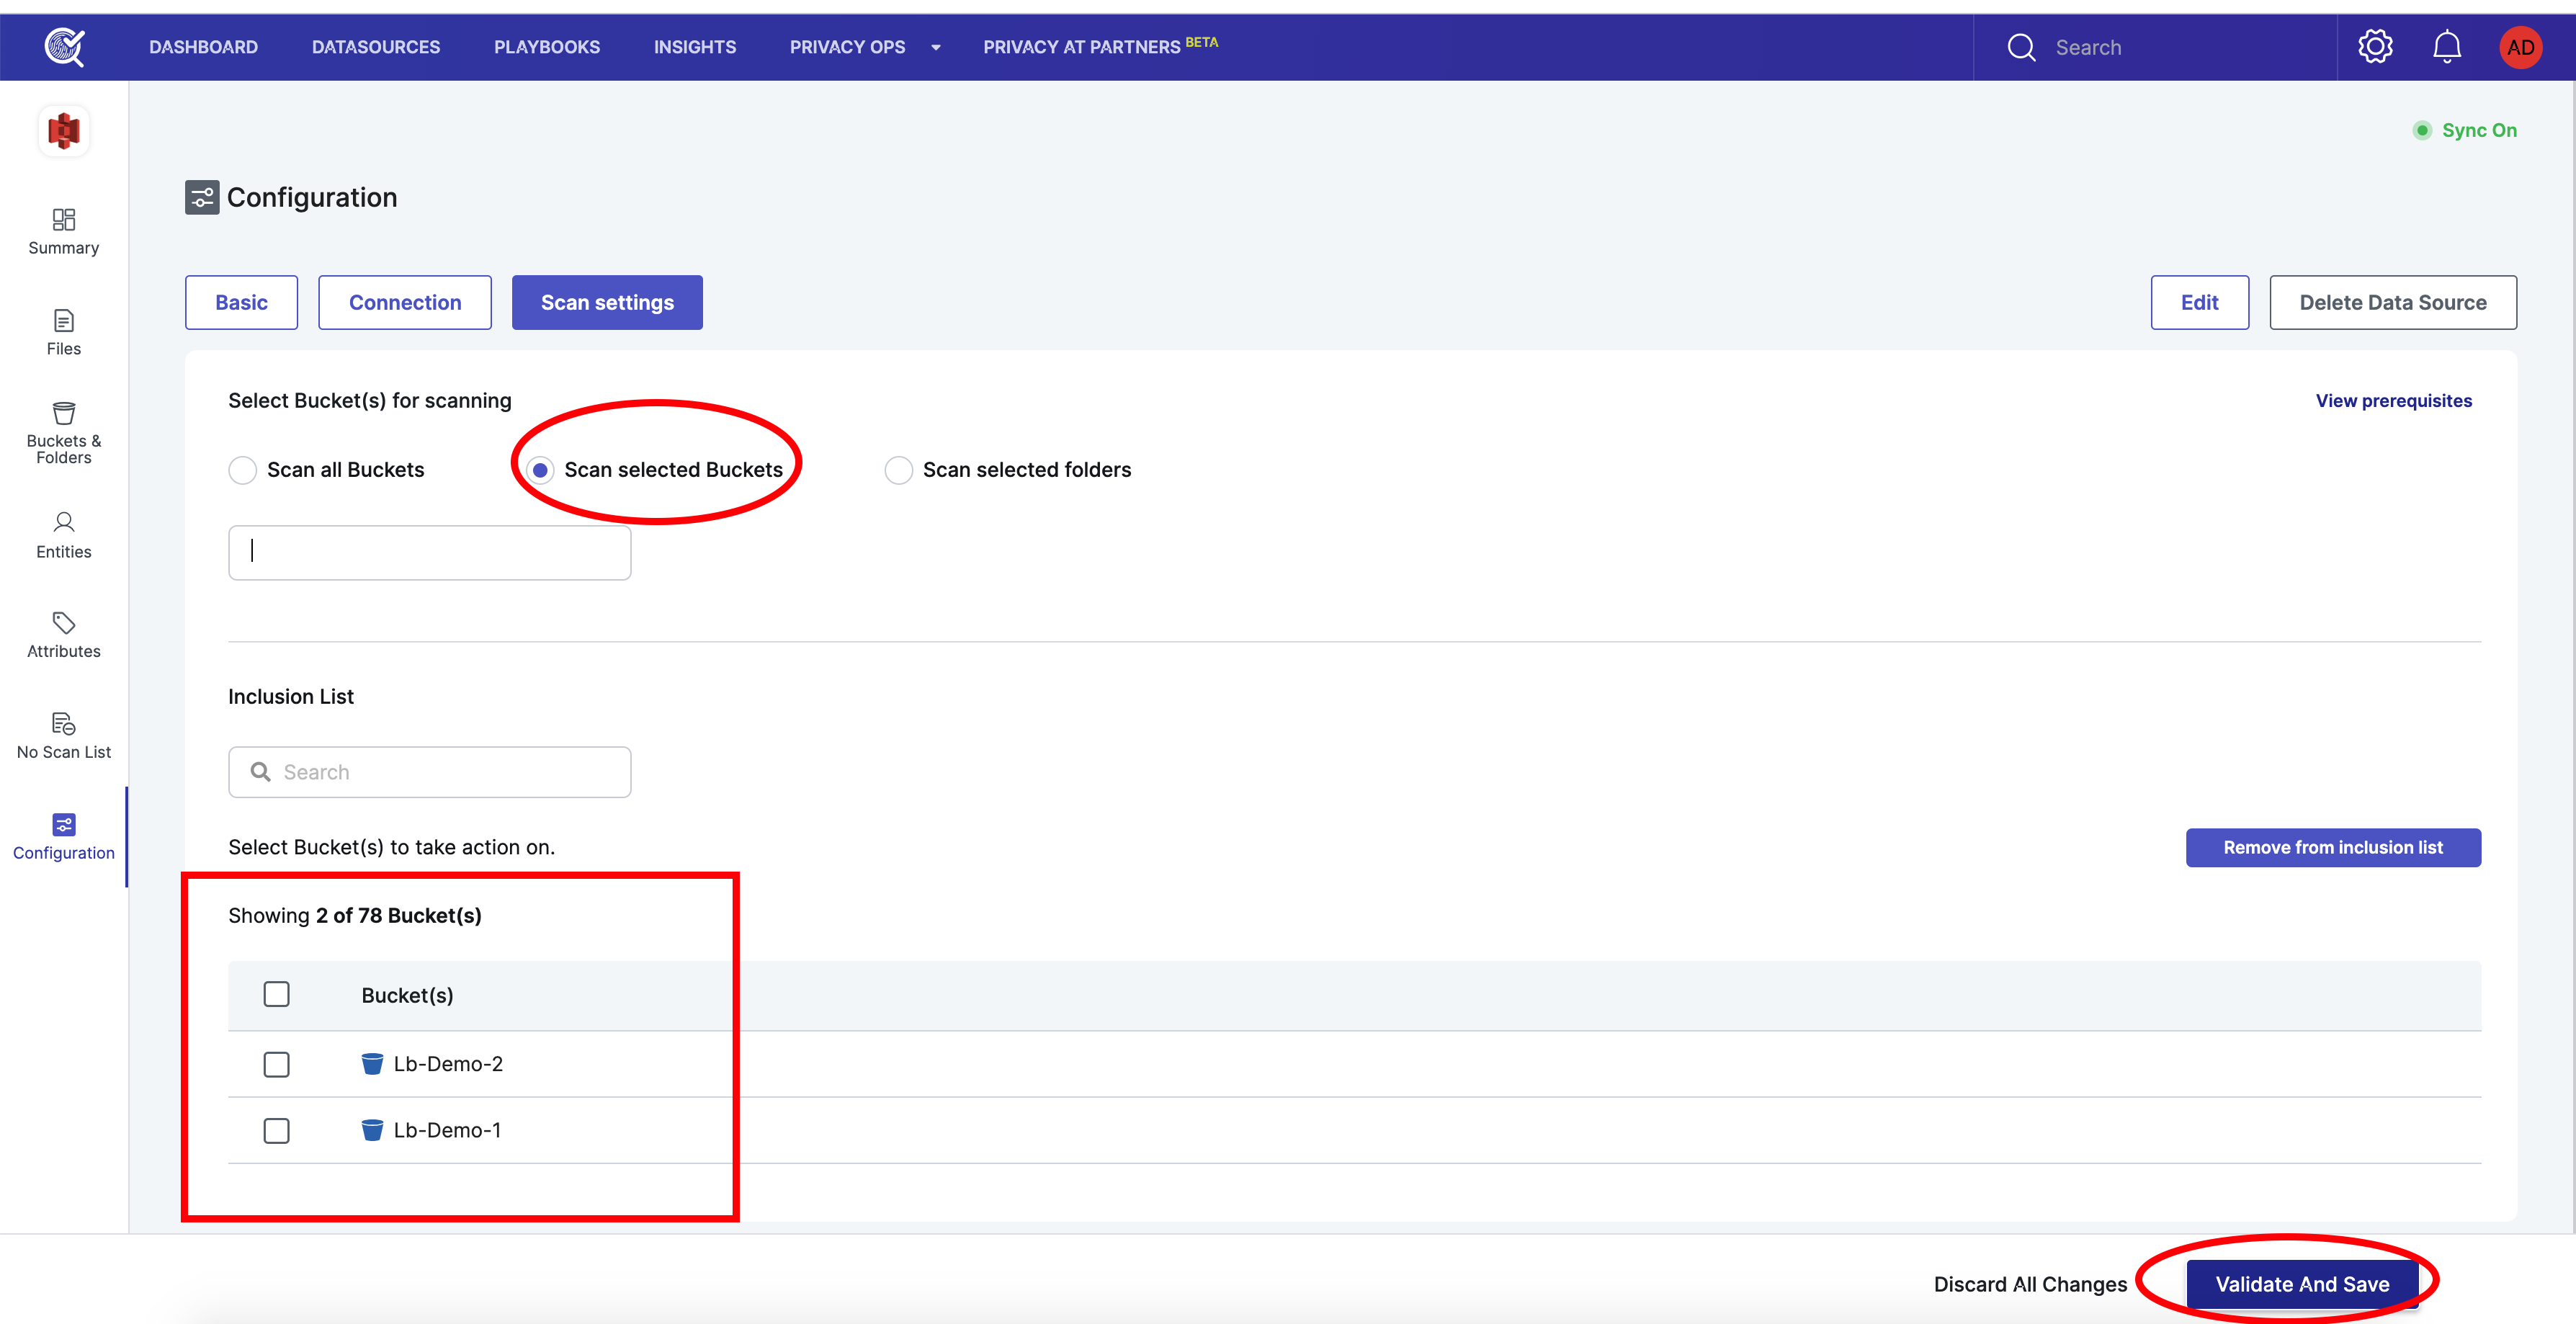
Figure 5.2(a) LightBeam AWS S3 - Scan selected buckets
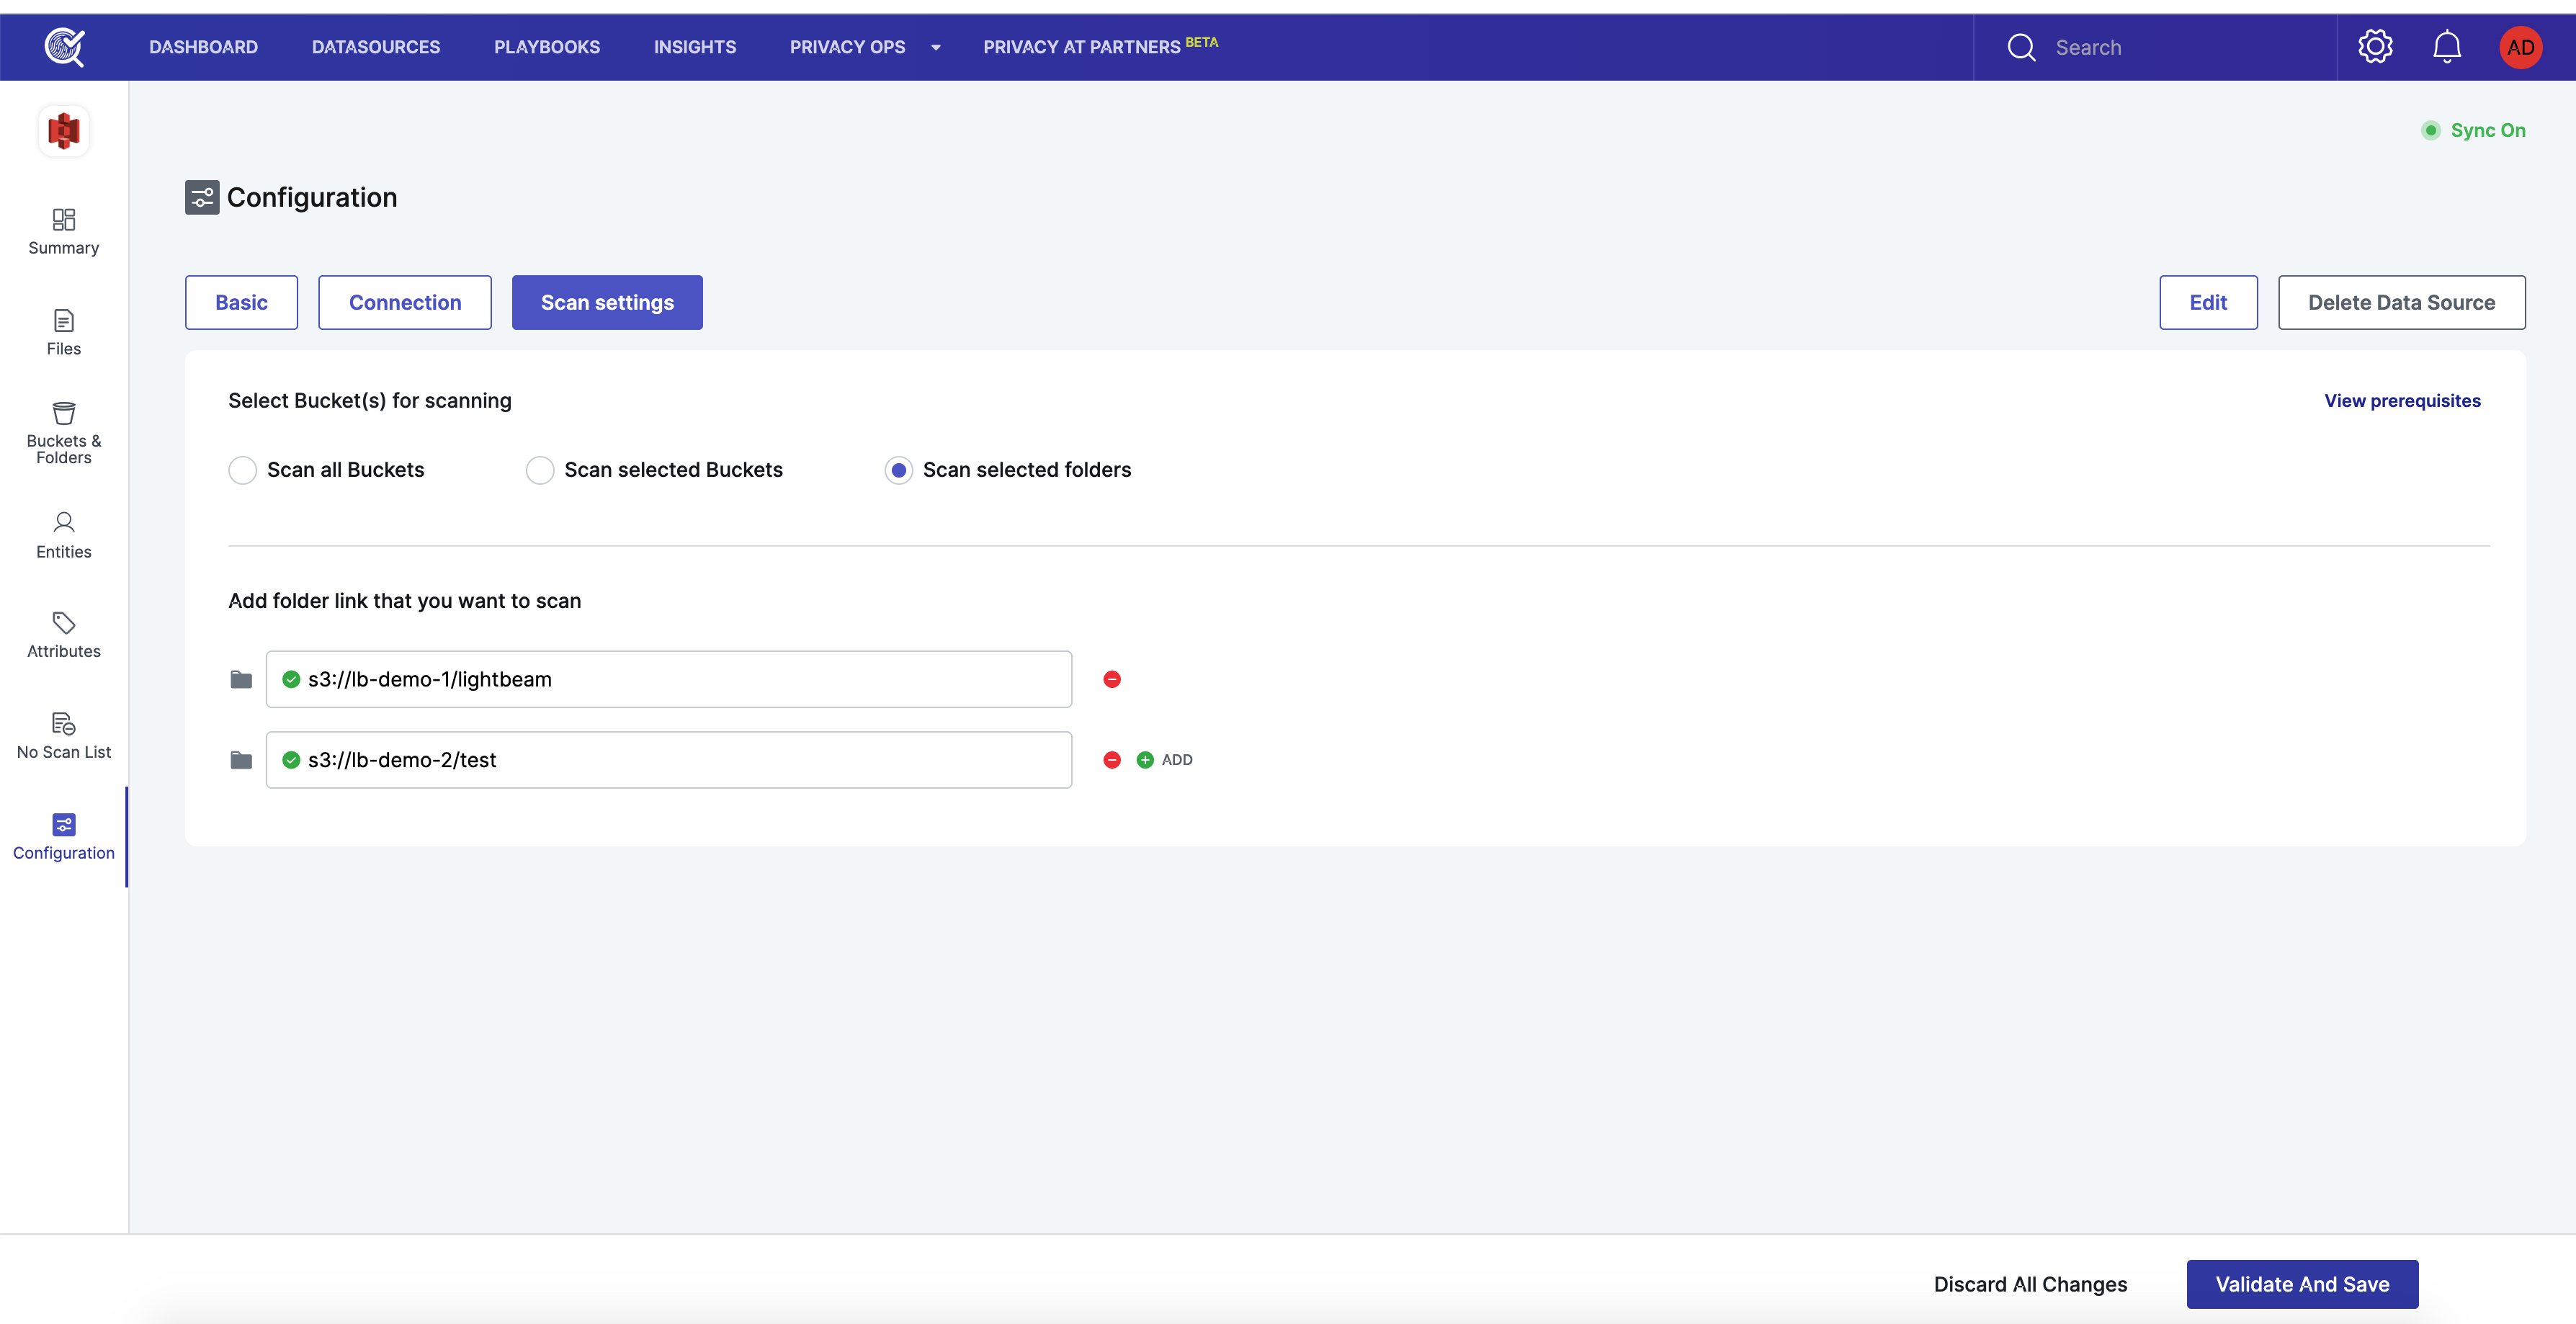
Figure 5.3(a) Scan selected folders - Registration of S3 Buckets